Tools Required:
- 5/16 Nut driver.
- Do not use a socket wrench.
- Do not over tighten – you will feel it snug up tight.
- Isopropyl alcohol and water or (IPA) 70%.
- Dry clean cloth or paper towels.
Notes:
- No matter how robust your adhesive is, or how well-suited it is to your application, a poorly prepared surface will negate the strongest adhesive. To ensure a strong bond, surface preparation is the key to success.
- For optimal bond performance, mounting tape adhesive should be applied at a temperature of 50-100°F (21-32°C). To ensure the best performance, surfaces should be dry and free of condensed moisture.
- See instructions below to install Amber conversion film cover or remove your lights.
Install Video:
Installation:
- Using a soft cloth and a 50:50 mixture of isopropyl alcohol and water or (IPA) 70%, clean the entire mounting area on the top of your vehicle. The alcohol will dissolve light grease and water will eliminate dirt and accumulated dust. Make sure the surface is thoroughly dry before applying the adhesive. Try not to touch the cleaned surface as finger oils and other contaminants may affect the bond. Make sure all surfaces are clean and dry.
- Apply three of the four 3M sticky pads provided with your kit to the underside of your COA cloth measuring tape, one at each end and one at the zero-inch center point to temporarily secure tape to the top of your vehicle to ensure correct placement. Using a small step ladder or by standing in the front open-door jambs, position yourself to carefully access the roof area. *Note: The zero-inch reference is at the mid-point on your cloth measuring tape. Center your zero-inch reference point where you want the center light.
- Attach cloth measuring tape to the cab of your vehicle
- Adhere the center adhesive tab on the measuring tape to the center of the roof by notating and aligning to center with the rear-view mirror placement. Affix the middle sticky pad approximately 1 to 6 inches away from the windshield as desired or necessary (see note below) on the center of the vehicle’s roof. This will be the position of your center light. *Note: The cab lights should be positioned on your vehicle’s roof so the rubber base forms a suction-tight seal smoothly over the curve of your roof, and should be mounted far enough back on the vehicle’s roof so the LED illuminates parallel to the road and does not point down to illuminate the hood of the vehicle.
- Gently pull each end of the measuring tape taut and stick the remaining two adhesive tabs on the measuring tape to each side of the roof, aligned parallel to the windshield roofline position on the top of your vehicle. This will ensure proper placement of each light. *Note: You can choose your cab light configuration spacing. For example, you can place three lights in the center and one each side, or you can evenly space the lights, whichever look you desire. It’s up to you!
- Pre-position your five cab lights on the roof of your vehicle, behind the measuring tape, aligning them as desired to the increments on the measuring tape, without removing protective film on adhesive tape. This will ensure proper placement before permanently adhering your cab lights to the roof.
- Stand away from the vehicle and take a good look at the placement of your lights. Make sure that you like the placement of cab lights that you have chosen before you move on to step 6. Rearrange as desired before proceeding.
- Starting with the center light at the middle position, remove the protective liner from the 3M adhesive strip on the bottom side of your center cab light and discard. *Note: Remove tape and apply each light one at a time to ensure proper placement of each light.
- Very carefully apply the adhesive side of the cab light to your pre-determined position marked by the increments you have chosen on your cloth measuring tape.
- Press down very firmly on the top of the light and hold for 5 to 10 seconds for permanent adhesive contact.
- Repeat steps A and B with the four remaining cab lights.
- Remove the cloth measuring tape secured by the temporary 3M sticky pads. Carefully clean any remaining adhesive residue from the measuring tape with alcohol and water using a clean dry towel.
That’s it! You’re done and ready to hit the road in safety and style!
Amber Lens Conversion:
To install Amber conversion LED lens film cover adhesive tabs (if you have ordered Clear or Smoked-colored lights and prefer Amber light over white light):
- Remove the cap nuts, lenses, and solar light battery packs (SLBP).
- Apply the 5 peel-and-stick Amber conversion LED lens film cover adhesive tabs (provided in your kit) over the COB LED lens on each SLBP.
- Reassemble in reverse: secure SLBP in place, affix lens cover into the rubber seal, and torque cap nuts 15-20-inch pounds.
Operating:
Two wireless remote switches are included in your Cab Over AmericaTM kit. 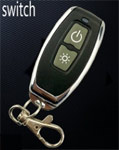
- Your remote-control key fobs have two buttons on the face (On and Off).
- The Sunburst (*) is the ON button at the back of the fob.
- The Circle with Intersecting Line (Q) is the OFF button at the front of the fob.
Removal of your cab lights:
Although our lights are permanently mounted, they can be removed and reinstalled on another vehicle. For each light:
- Remove the two cap nuts using a 8-32 nut driver, remove the lens, the solar light battery pack (SLBP), and the rubber base leaving only the aluminum stud plate. *Note: If your paint is in good condition, there should be no damage to your vehicle. Please note that Cab Over AmericaTM LLC cannot be responsible for paint damage that may occur from removing your cab lights.
- Using a hair dryer on a medium- or high-heat setting, apply heat to the aluminum stud plate. Hold the hair dryer a few inches away from the aluminum base and the painted surface of the cab, focusing on the edges and corners of the aluminum plate. This will cause the glue in the tape to soften.
- After a few minutes, set the hairdryer aside and try to lift one of the corners of the aluminum base and tape with your fingernail or similar non-damaging item. Be careful not to cause damage to the paint. Most of the tape should come off, but you may need to apply heat from the hair dryer again.
- Using a soft cloth and a 50:50 mixture of isopropyl alcohol and water or (IPA) 70%, gently remove any remaining adhesive. The alcohol will dissolve the adhesive residue and remove any accumulated dirt.
- *Note: You can the purchase new Scotch 3MTM Scotch® Extremely Strong Mounting Tape online or from local home improvement retailers. Simply reapply new adhesive to your cab lights and you are ready to mount them on your next vehicle.
Solar charge time may vary depending on weather conditions and geographic location. We recommend if you park in a garage or carport that you can mount a high watt shop light 1ft. over the cab lights to charge them as desired.